


Introduction: Laying new sod is an exciting way to instantly upgrade your Oakville lawn – but proper watering will determine whether that fresh green carpet truly thrives. New sod is thirsty and requires careful attention. Many homeowners accidentally overwater or underwater their sod, causing the grass to rot or dry out.
Oakville’s warm summers (with occasional heat waves and dry spells) make it even more important to get watering right.
1. Water Immediately and Thoroughly After Installation
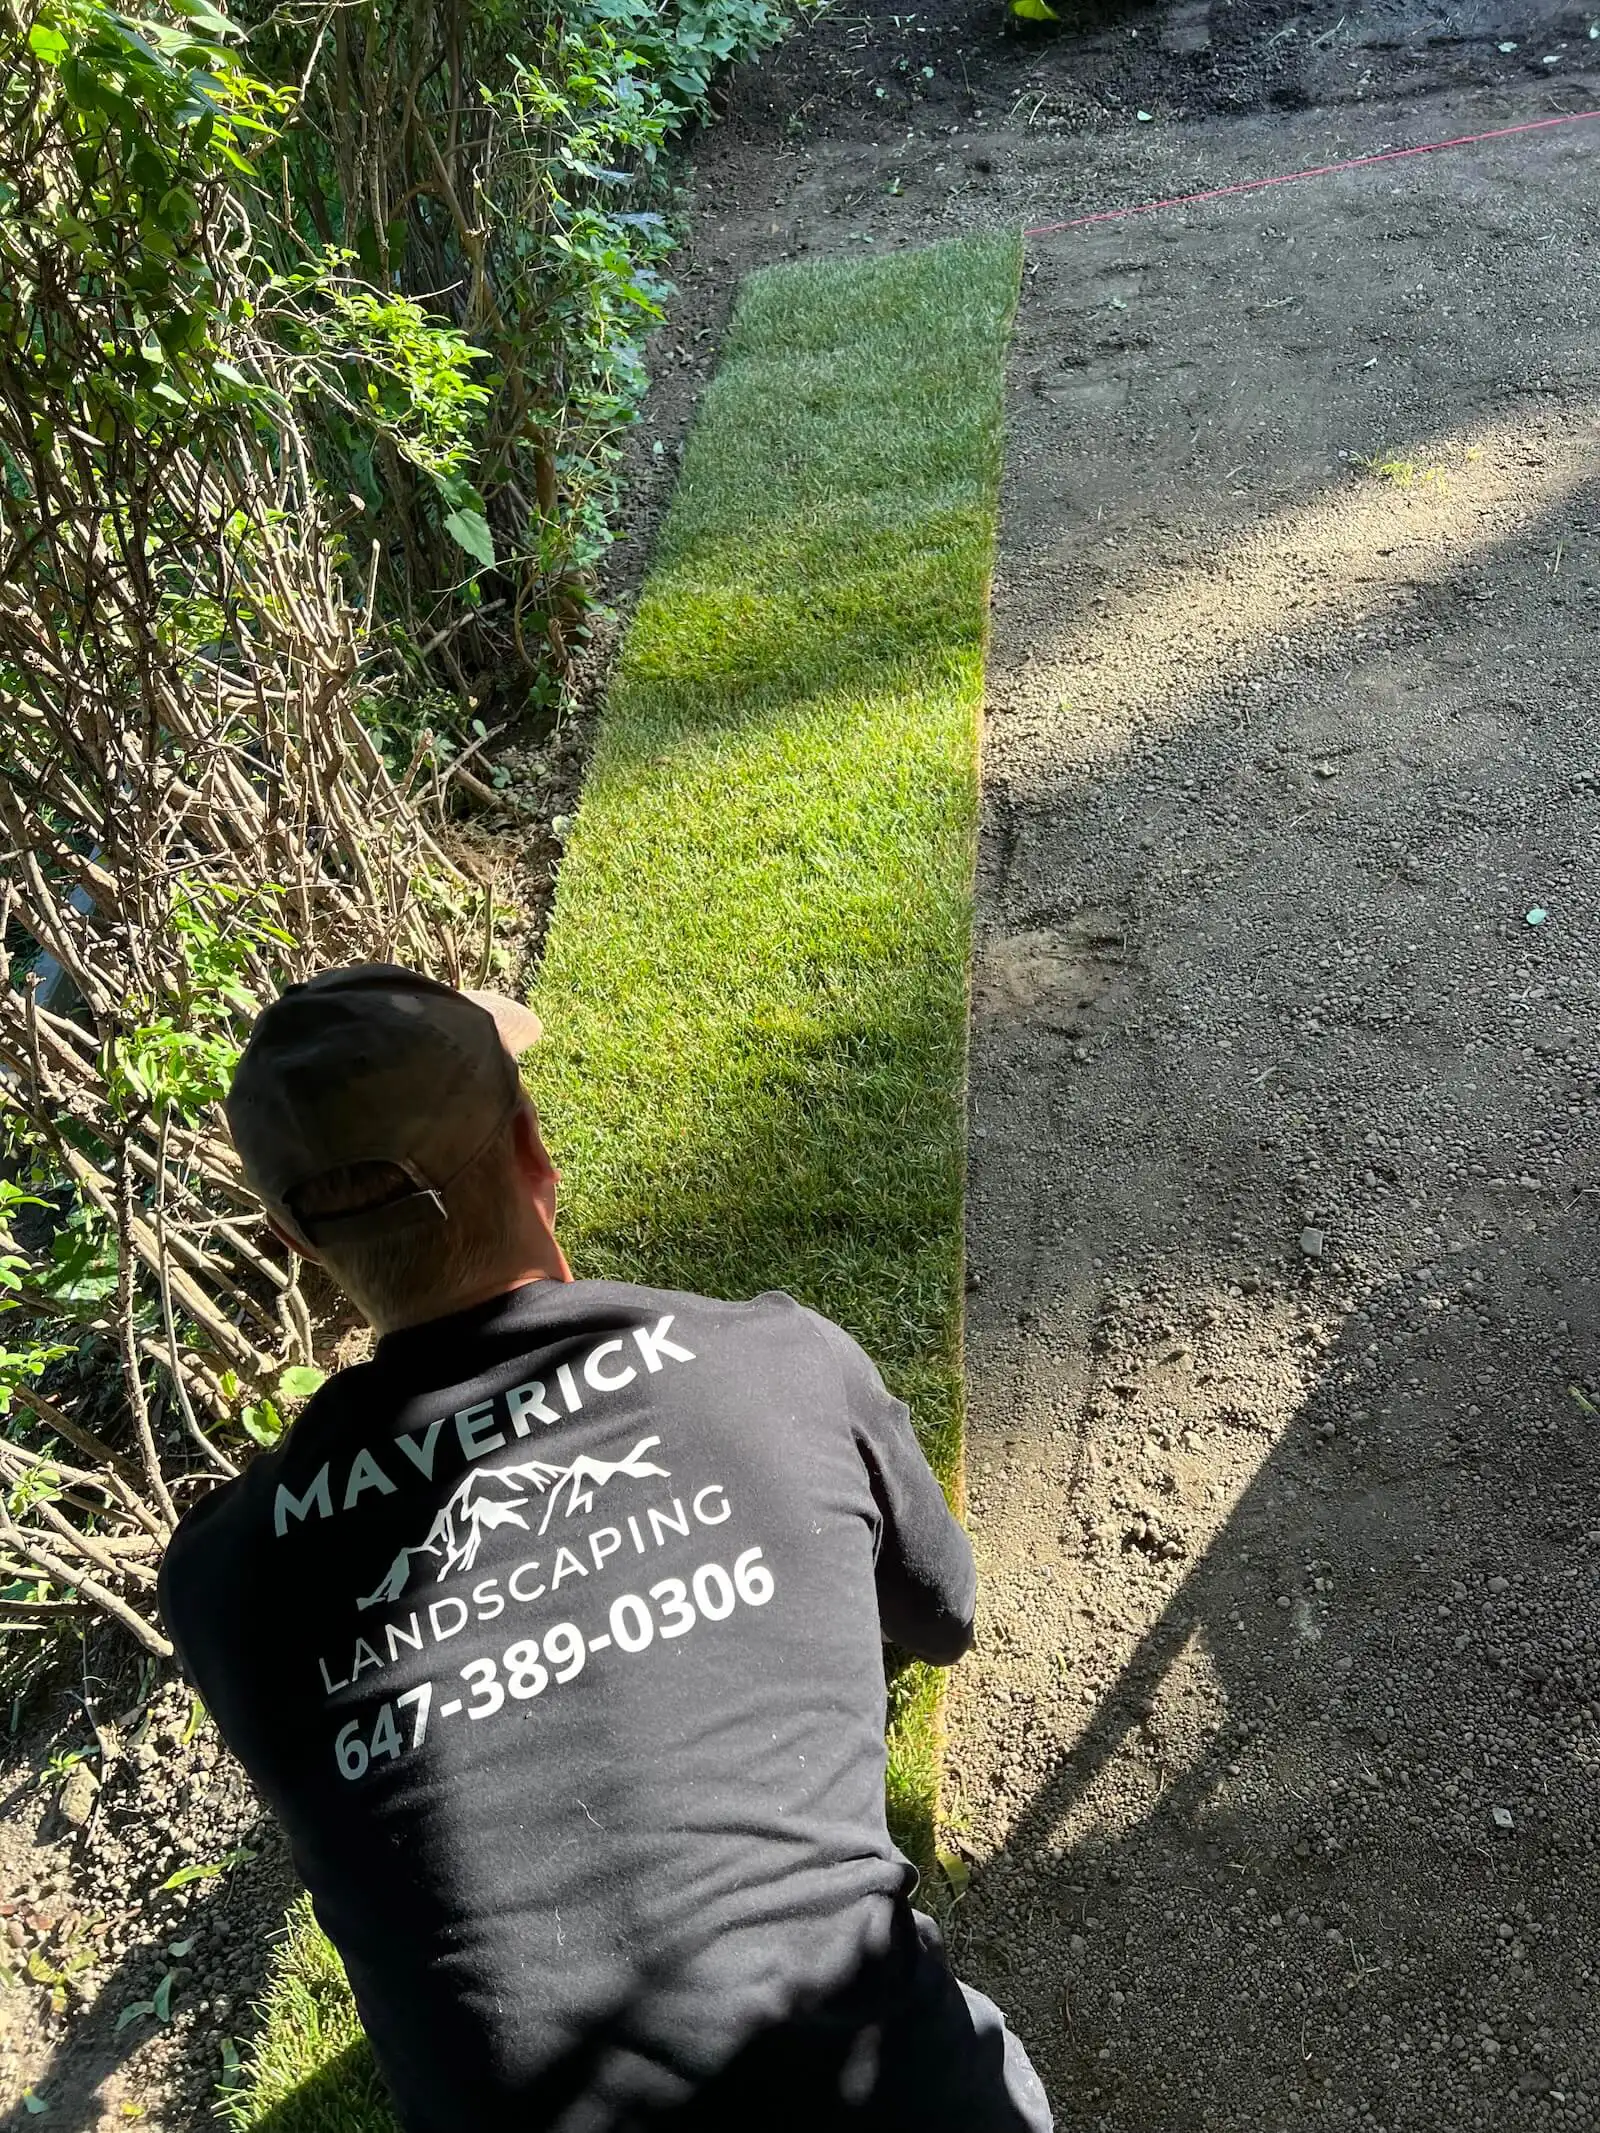
A homeowner thoroughly waters freshly laid sod to help it settle and root.
The first watering right after your new sod is laid is the most crucial. Don’t wait – as soon as the last roll is installed, give your lawn a deep, thorough soaking. In fact, experts recommend you begin watering within 30 minutes of installation to prevent the sod from drying out and to help the grass roots make contact with the soil. Saturate the sod and the topsoil beneath it; this initial deep watering helps “settle” the sod into place and ensures the entire root zone has plenty of moisture from the start.
When watering new sod for the first time, make sure the water penetrates several inches into the soil beneath the sod pads. You can check by lifting a corner of a sod roll – the underlying soil should be moist to a depth of about 3 – 4 inches. If it’s only wet on the surface, keep watering. However, avoid creating soupy, waterlogged conditions; the soil should be damp but not drowning.
This deep initial watering is vital for sod establishment, giving the grass “a much-needed boost” to start rooting into your Oakville topsoil.
Pro tip
Be gentle when watering the first day to not displace the sod. If using a sprinkler, try not to walk on the freshly watered sod – it will be soft and you don’t want to leave footprints or sink spots in the new lawn.
2. Keep the Sod Consistently Moist in the First 2 Weeks
New sod has very short roots, so it cannot tap deeper soil moisture yet – that’s why the first couple of weeks require diligent watering. The goal is to keep the top few inches of soil consistently damp at all times during these initial 14 days. In practice, this means watering at least once per day, and often 2 – 3 times per day in hot or dry weather to prevent any drying out. Early morning and late afternoon are typically the best times (more on timing in the next section), but you might need an extra midday watering if it’s very hot (above ~29 °C).
- Hot weather (high 20s/30s°C): Plan on watering twice daily, in the cool morning and again in late afternoon or early evening. This ensures the sod never dries out in the heat of the day.
- Mild weather (low 20s°C):Once per day deep watering may be sufficient. Always check that the soil stays moist – if it’s drying by evening, add a second watering.
- Rainy periods: Mother Nature can help. Cut back your watering if there’s significant rainfall, but still monitor the lawn. New sod can actually get too much water – constantly soggy soil can encourage fungal diseases in the young grass. So if rain soaked the ground, you can skip the next scheduled watering and let the sod breathe a bit.
Throughout the first two weeks, check your sod daily. Touch the grass and soil – it should feel moist but not muddy. Pay extra attention to the edges and corners of each sod roll; those areas dry out fastest. If you notice the edges of the sod pieces starting to curl up or turn brown, that’s a clear sign of drying and the lawn needs water immediately.
Consistency is key: do not let new sod wilt or go crunchy dry even once in these early days, or its tender roots could be damaged. By keeping the ground consistently damp (not puddled) in weeks one and two, you’re helping the sod develop a strong root system before it faces any drought stress.

3. Water at the Optimal Times of Day
When you water can be just as important as how you water. Timing your irrigation will maximize absorption and minimize problems. The best time to water new sod is early morning, ideally around sunrise. In the cool morning hours, the water can soak into the soil with minimal evaporation loss. Oakville’s municipal guidelines also encourage watering during “the coolest parts of the day, when the least amount of evaporation will occur,” to use water efficiently. An early start hydrates your grass before the day’s heat hits.
If you need to water twice in a day, the late afternoon or early evening (e.g. around 4 – 6 PM) is a good second slot – the peak sun has passed, but there’s still enough daylight and warmth for the grass to dry a bit before night. Avoid watering late at night whenever possible. Sod left wet overnight, when temperatures cool, creates a perfect breeding ground for fungal diseases and mold. A common mistake is to set sprinklers at 9 or 10 PM; this can leave your new lawn damp for 12+ hours in darkness, greatly increasing the risk of turf diseases.
Just as important, do not water in the mid-day heat unless absolutely necessary. In Oakville’s summer sun, a lot of water will evaporate if you irrigate at noon – meaning wasted water and less moisture reaching the roots. Midday watering can also shock the grass (think of cold water hitting hot turf). So, plan your schedule around the cooler parts of the day. Morning watering is usually sufficient, with an additional late-day watering during hot spells. By watering at optimal times, you ensure the sod gets the moisture it needs with minimal waste and reduce the likelihood of lawn diseases.
4. Water Deeply as the Sod Establishes (and Gradually Reduce Frequency)
During the first couple of weeks, you focused on frequent watering. After about two weeks, your new sod will start developing deeper roots, and you can transition your approach. The mantra for an established lawn is “water deeply, less often.”
Deep watering trains the grass roots to grow downward in search of moisture, which ultimately creates a drought-resistant, healthy lawn. In contrast, light frequent watering keeps roots shallow and dependent on surface water. As your sod approaches the third week and beyond, you should dial back the frequency of watering but increase the soaking depth.
Here’s how to transition:
- Weeks 3 – 4:
Instead of watering every day, start watering every other day (or about 3 times a week), but water for a longer duration so that the moisture penetrates 4 – 6 inches into the soil. The soil should be thoroughly wet at depth after each session. This encourages the roots to follow the water deeper into the ground.
- Weeks 5 – 6:
You can further reduce frequency to about 2 times per week, as long as each watering is a good deep soak. The sod is getting more established now, and deeper roots won’t require daily water. Always monitor weather – if it’s very hot and dry, you might need to water a bit more often; if it’s cool or rainy, less often.
- After 6 weeks:
By this time, your new sod should be fully rooted into the native soil. Now you can settle into a regular lawn irrigation routine. Typically, established lawns in our region need about 1 to 1.5 inches of water per week, which you can deliver via one or two deep waterings per week (rather than a little every day).
For example, you might water deeply every 4 days in the summer, ensuring that each watering wets the soil to 6+ inches deep. This fulfills the lawn’s weekly water needs and hardens it against drought.
Remember, the exact timing should be adjusted based on season and weather. In cooler spring or fall conditions, even once-a-week watering may suffice. In the peak of Oakville summer, you might stick to twice weekly. The core idea is to always favor a deep, thorough soaking over frequent shallow sprinkles.
Deep watering leads to stronger root growth and a healthier lawn. Shallow watering, on the other hand, only wets the surface, and your grass roots will sadly stay near the top waiting for the next sprinkle – leaving the lawn weak and vulnerable to drying out. By gradually extending the interval between waterings and watering more deeply as weeks go on, you’ll wean your new sod off of “babying” and encourage it to become a self-reliant, deeply-rooted lawn.

5. Monitor Your Sod and Adjust Watering as Needed
Every lawn is a little different, so it’s important to keep an eye on your sod’s condition and respond accordingly. Proper watering is a bit of a balancing act – too little and the sod will dry up; too much and you risk fungus or root rot. Thankfully, your grass will give you clues if it’s unhappy. Get in the habit of walking your lawn daily (even just a quick scan) to catch any early warning signs and tweak your watering schedule.
Watch for signs of under-watering. If parts of the sod look dull, bluish-gray, or are losing that rich green color, they are thirsty – grass often turns a blue-green tint right before it browns from drought stress.
Take a close look at the sod seams and corners: if the sod is shrinking and pulling up at the corners or gaps are appearing between rolls, it’s drying out. Also, step on the grass – if it doesn’t spring back up and stays matted, that’s a sign of insufficient water. Any brown or yellow patches in new sod usually indicate it has dried out at some point. At the first sign of dryness, water immediately and increase your watering frequency or duration for that area going forward.
Also beware of over-watering. Yes, new sod needs a lot of moisture, but it shouldn’t be sitting in a swamp. Symptoms of too much water include a squishy, soggy feeling when you walk on the grass, or visible puddling and pooling of water around the edges of the sod pieces.
If the ground is constantly waterlogged, the grass may start to turn yellow (a sign of oxygen-starved roots or fungal infection) even though you’ve been watering diligently. Over-watered sod can also develop mushrooms or mold growth. If you see these signs, back off on the watering and let the topsoil dry out a bit. New sod that’s kept too wet can develop shallow roots or even root rot, so finding the right moisture balance is key.
To stay on top of things, here are a few monitoring tips:
- Lift a corner of sod in various spots every few days to peek at the soil beneath. It should be moist and cool to the touch, not dust-dry and not sopping. This simple check is one of the best ways to know what’s happening at the root level.
- Use a soil probe or screwdriver pushed into the ground to test moisture depth. If it’s hard to push in, the soil is too dry; if it comes out muddy and dripping, the soil is over-saturated.
- Keep a rain gauge in your yard. This will tell you how much rain fell in a storm so you can adjust watering accordingly (no need to water if nature provided 1 inch of rain yesterday!). Aim for that ~1 inch total water per week after establishment – what the sky doesn’t supply, your sprinkler should.
- Adjust for micro-areas. Sometimes one part of your lawn dries faster (for example, near a sidewalk or a south-facing slope). You may need to water those spots a bit extra or by hand. Other areas that stay shaded or low-lying might need less. Don’t assume every zone is identical.
Lastly, be mindful of any local watering restrictions in Oakville or Halton Region, especially during summer. Oakville often uses an odd/even day watering system for established lawns, but new sod is typically exempt from these restrictions until it’s established (you are allowed to water new sod even during water bans, as it’s critical for the sod’s survival). Still, try to water wisely and not waste – deep, targeted watering is both lawn-friendly and eco-friendly.
By closely monitoring your lawn and staying flexible, you can ensure your new sod gets exactly what it needs. If you catch problems early – a drying patch or an overly wet spot – a simple adjustment will get your lawn back on track before any serious damage occurs. In short, listen to your lawn: healthy new sod will look green and perky, whereas thirsty sod will wilt, and overwatered sod will discolor. Tweak your watering as needed, and you’ll be rewarded with a thriving green yard.
Watering new sod properly is the foundation of a healthy lawn. By following these top five practices – immediate deep watering at installation, consistent moisture in the first weeks, smart timing, deep soakings as the sod roots in, and attentive monitoring – you are setting your lawn up for success. Remember that proper watering in the early weeks is an investment in the longevity and beauty of your landscape. It will ensure your new sod develops a robust root system, resulting in a vibrant, lush lawn that can withstand summer heat and dry spells.
With a bit of effort and care, your Oakville yard will soon be the envy of the neighborhood – a carpet of green that stays healthy year after year. And if you ever feel unsure about your watering strategy or run into issues with your new sod, don’t hesitate to reach out to local lawn care professionals.
Sometimes a quick consultation or service call can save your lawn (and give you peace of mind). Maverick Landscaping is here to help Oakville homeowners with all aspects of new sod installation, watering systems, and lawn maintenance. With the right watering practices and perhaps a little expert guidance, your new sod will grow in strong and beautiful. Happy watering, and enjoy your flourishing new lawn!


